I created my digipak in the software Adobe photoshop, this was a goodsoftware to use as I could use different image and text effects.
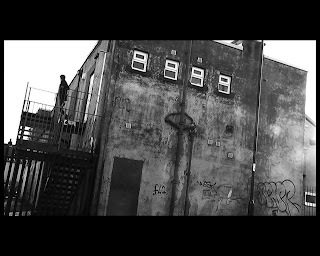
Firstly I used a shot that we had used in the music video, the shot of the the warehouse, i printscreened this fromthe video footage as a JPEG and imported it into photoshop after this I adjusted the levels of the colour to add a darker black and white effect to thephoto.
Firstly I used a shot that we had used in the music video, the shot of the the warehouse, i printscreened this fromthe video footage as a JPEG and imported it into photoshop after this I adjusted the levels of the colour to add a darker black and white effect to thephoto.
 I again took a printscreen from our video, this was a printscreen of anilluminati eye, i used multiple layering and a blending modes and changed theopacity to blend the eye to look like it was on the wall.
 I made a NIN logo, using shape tools and the text tool, then added a filtereffect. and put this in the black space at the bottom aswell as the Album name'Lights in the sky' and 'Nine Inch Nails'
I used a small gold font for the artistname, but most our of audience would recognise the NIN logo.
 For the rear of the digipak I used the same image as the front but zoomedin as this is common to have correlation between the front and rear panels.
All i needed to do was just adjust the size of the two images by freetransforming the image then dragging the corners until the size was
I added a black rectangle at the bottom of the page to include company logo's,copyright information, barcode, social media # and @ which I imported the facebook and twitter icons.
I used a white font to stand out for the background to include the set list ofthe album.
 I edited the inner panels again by using blend modes and adjust the lightinglevels of the image and zooming and cropping in to create a nice effect where the two images were linked but still different.
No comments:
Post a Comment
All Comments Are Moderated